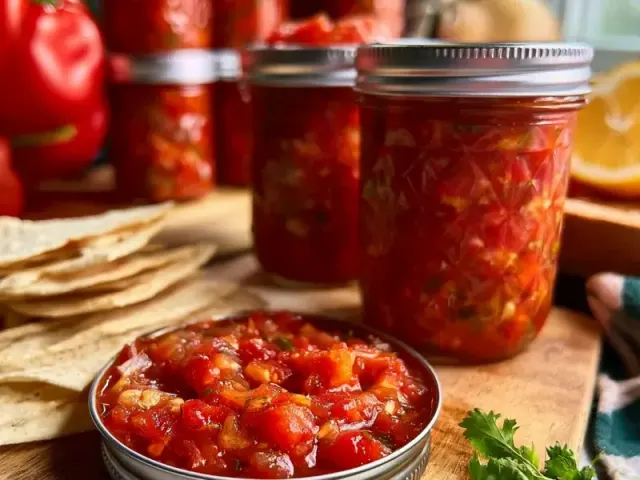
Canning Garden Salsa: A Foolproof Method for Fresh Flavor All Year
There is nothing quite like the smell of ripe tomatoes and onions simmering on the stove, a pot of deep red salsa bubbling away. The kitchen window steams up, and you know that in a few hours, those bright, chunky jars will line your pantry shelf — a little piece of August ready to open in January. Canning garden salsa is one of the most rewarding projects you can tackle, but it does require a bit of precision. Get the acidity right, and you will have a shelf-stable product that tastes far better than anything from a store.

Why Acidity Is Non-Negotiable
Tomatoes are borderline in terms of acidity. Some varieties are more acidic than others, and as they ripen, their pH can rise. That is why a tested recipe like this one uses bottled lemon juice — it provides a consistent, guaranteed level of acid. I keep the ratio at 1/2 cup of bottled lemon juice for every 5 pounds of tomatoes. Do not swap in fresh lemon juice or vinegar without understanding the pH implications. The goal is a final pH of 4.6 or lower, which prevents the growth of Clostridium botulinum spores. This is not a step to fudge.
Choosing the Right Tomatoes
Roma or San Marzano paste tomatoes are ideal because they have thicker walls, fewer seeds, and less water content. This means your salsa will be chunky, not watery. If you use beefsteak or other slicing tomatoes, you will need to simmer the salsa longer — up to 20 minutes — to evaporate excess liquid. A common mistake is to skip the peeling step. Tomato skins become tough and chewy during processing, so take the time to blanch and peel them. It takes an extra 10 minutes and makes a big difference in texture.
How to Peel Tomatoes Efficiently
Bring a large pot of water to a rolling boil. Score a shallow X on the bottom of each tomato. Drop them in, no more than 4 at a time, for 45 to 60 seconds. You will see the skin start to curl away from the X. Use a slotted spoon to transfer them to a bowl of ice water. Once cool, the skins slip right off. Core the tomatoes and chop them into 1/2-inch pieces. You will need about 8 cups of chopped tomatoes for this recipe.
Building the Flavor Base
Onions and peppers are the backbone of this salsa. I use a mix of white onion and both green and red bell peppers for color and sweetness. The jalapeños add heat — I seed them to keep the heat moderate, but you can leave some seeds in if you like it spicier. Garlic is minced fine so it distributes evenly. The dry spices — cumin, black pepper, and a touch of sugar — round out the acidity. Sugar is optional, but I find it balances the lemon juice nicely without making the salsa sweet.
One important note: do not add fresh cilantro to the salsa before canning. Cilantro becomes bitter and turns an unappealing brown during the high heat of processing. Instead, stir in a handful of chopped fresh cilantro just before serving. That way, you get the bright, herbal note without the off-flavor.
The Simmering Step
Combine all the ingredients except the cilantro in a large stainless steel or enamel pot. Do not use aluminum or unlined copper — the acid will react with the metal, giving the salsa a metallic taste. Bring the mixture to a boil over medium-high heat, then reduce to a simmer for 10 minutes. Stir occasionally to prevent sticking. You will see the salsa thicken slightly as the vegetables soften and release their juices. The color will deepen from bright red to a richer, more rustic hue. The aroma at this stage is intoxicating — a little sharp from the lemon juice, warm from the cumin, and sweet from the peppers.
Filling and Processing the Jars
While the salsa simmers, prepare your canner and jars. I keep the jars hot (about 180°F) so they do not crack when filled with hot salsa. Use a wide-mouth funnel to ladle the salsa into each jar, leaving 1/2-inch headspace. This gap is essential — it allows the contents to expand during processing and form a proper vacuum seal. Run a non-metallic spatula or chopstick around the inside of each jar to release trapped air bubbles. Wipe the rims clean with a damp paper towel. Any residue on the rim can prevent the lid from sealing.
Center a lid on each jar, then screw on the band until it is fingertip-tight — meaning you tighten it with just your fingertips, not your whole hand. Over-tightening can cause the lids to buckle during processing. Place the jars in the boiling water bath, ensuring they are covered by at least 1 inch of water. Cover the canner, bring back to a full boil, and process for 15 minutes. If you live at an altitude above 1,000 feet, you need to add processing time: 5 minutes for 1,001–3,000 ft, 10 minutes for 3,001–6,000 ft.
Cooling and Checking Seals
After the processing time is up, turn off the heat and let the canner sit for 5 minutes. Then use a jar lifter to transfer the jars to a thick towel or wooden board, spacing them at least an inch apart. Do not tighten the bands. Let them cool undisturbed for 12 to 24 hours. During this time, you will hear the satisfying ping as each lid seals. After cooling, press the center of each lid — it should be concave and not flex. If a lid pops up and down, the jar did not seal. Refrigerate that jar and use it within 2 weeks.
Final Thoughts
Canning garden salsa is a straightforward process when you follow the right ratios and safety steps. The payoff is a pantry full of bright, chunky salsa that tastes like summer. Use it on tacos, over eggs, or straight from the jar with a spoon (no judgment). Remember to label your jars with the date, and store them in a cool, dark cupboard. For best quality, use within 12 to 18 months — though in my experience, it never lasts that long.
Frequently Asked Questions
Why do I need to use bottled lemon juice instead of fresh?
Bottled lemon juice has a standardized acidity level (usually 5% or higher), which is essential for safe water bath canning. Fresh lemon juice can vary in acidity, which may not be high enough to prevent the growth of harmful bacteria like Clostridium botulinum. The USDA recommends bottled lemon juice for all tomato-based canning recipes.
Can I add cilantro to the salsa before canning?
It is not recommended. Cilantro loses its flavor and turns bitter during the high heat of processing. It also can darken the salsa's color. Instead, stir in fresh chopped cilantro just before serving for the brightest flavor.
How do I know if my jars sealed properly?
After the jars cool for 12-24 hours, press the center of each lid. If it is concave (curved down) and does not flex or pop when pressed, the jar is sealed. You can also remove the band and gently lift the jar by the lid — if the lid holds, it is sealed. Any unsealed jars should be refrigerated and used within 2 weeks.
Can I use different types of tomatoes?
Yes, but Roma or other paste tomatoes are best because they have less water and more flesh, resulting in a thicker salsa. If you use slicing or heirloom tomatoes, you may need to simmer the salsa longer (up to 20-25 minutes) to reduce excess liquid, or drain some of the juice before cooking.
How long will canned salsa last?
When stored in a cool, dark place (50-70°F), properly sealed jars of salsa will maintain their best quality for 12-18 months. They will remain safe to eat for years if the seal stays intact, but the flavor and texture will degrade over time. Always check for signs of spoilage (mold, off-odors, leaking) before eating.
Classic Garden Salsa for Canning

A perfectly balanced, shelf-stable salsa made from fresh garden tomatoes, peppers, and onions, canned safely using a water bath method.
- Large stockpot
- water bath canner
- canning rack
- 6 pint jars with lids and bands
- jar lifter
- wide-mouth funnel
- ladle
- kitchen towels
- cutting board
- sharp knife
- large bowl
- colander
- 5 pounds ripe Roma or paste tomatoes (peeled and chopped)
- 2 cups chopped white onion (about 2 medium)
- 1 cup chopped green bell pepper (about 1 large)
- 1 cup chopped red bell pepper (about 1 large)
- 4-6 jalapeño peppers (seeded and minced (adjust for heat))
- 6 cloves garlic (minced)
- 1/2 cup bottled lemon juice (not fresh, for consistent acidity)
- 1 tablespoon salt (canning or kosher, not iodized)
- 1 teaspoon ground cumin
- 1 teaspoon black pepper
- 1 tablespoon sugar (optional, to balance acidity)
- 1/2 cup chopped fresh cilantro (optional, added just before serving, not for canning)
- Prepare your canning station: wash jars in hot soapy water, rinse, and keep them hot in the canner at 180°F. Place lids in a small saucepan of hot water (not boiling) to soften the seals.
- Peel the tomatoes: score a small X on the bottom of each tomato, blanch in boiling water for 45-60 seconds until the skin splits, then plunge into an ice water bath. Slip off the skins, core, and chop the tomatoes into 1/2-inch pieces. You need 8 cups of chopped tomatoes.
- In a large stainless steel or enamel pot (not aluminum, which reacts with acid), combine the chopped tomatoes, onions, bell peppers, jalapeños, garlic, lemon juice, salt, cumin, black pepper, and sugar if using. Do not add cilantro now — it will turn bitter and dark during processing.
- Bring the mixture to a boil over medium-high heat, stirring frequently to prevent sticking. Reduce heat and simmer for 10 minutes, stirring occasionally. The salsa will thicken slightly and the vegetables will soften.
- During simmering, prepare the water bath: fill the canner about half full with water, bring to a boil. Place the hot jars on a clean towel.
- Ladle the hot salsa into the hot jars using a wide-mouth funnel, leaving 1/2-inch headspace. Remove air bubbles by sliding a non-metallic spatula (or chopstick) around the inside of each jar. Wipe the jar rims with a clean, damp paper towel. Center a lid on each jar, then screw on the band until fingertip-tight.
- Using a jar lifter, place the filled jars into the boiling water bath, ensuring they are covered by at least 1 inch of water. Cover the canner, bring back to a full rolling boil, and process for 15 minutes (adjust for altitude: add 5 minutes if 1,001–3,000 ft, 10 minutes if 3,001–6,000 ft).
- After processing, turn off the heat, remove the canner lid, and let the jars sit for 5 minutes. Then lift them out onto a thick towel or wooden board, leaving at least 1 inch of space between jars. Do not tighten the bands.
- Let the jars cool undisturbed for 12-24 hours. You will hear the satisfying ping of lids sealing. After cooling, press the center of each lid — it should be concave and not flex. Any unsealed jars should be refrigerated and used within 2 weeks.
- Label the sealed jars with the date and store in a cool, dark place. For best quality, use within 12-18 months.
Storage: Keep sealed jars in a cool, dark cupboard (50-70°F). Once opened, refrigerate and use within 1 week. Serving: For the freshest flavor, stir in chopped cilantro just before serving. This salsa is excellent as a dip, on tacos, or over eggs. Safety: The bottled lemon juice is critical — its consistent acidity ensures the salsa is safe for water bath canning. Do not substitute fresh lemon juice or vinegar without testing pH. Common allergens: None naturally present. For individuals with specific dietary concerns (e.g., low-acid or low-sodium diets), consult a qualified healthcare professional.
Recipe: Classic Garden Salsa for Canning
Equipment
- Large stockpot
- water bath canner
- canning rack
- 6 pint jars with lids and bands
- jar lifter
- wide-mouth funnel
- ladle
- kitchen towels
- cutting board
- sharp knife
- large bowl
- colander
Ingredients
- 5 pounds ripe Roma or paste tomatoes (peeled and chopped)
- 2 cups chopped white onion (about 2 medium)
- 1 cup chopped green bell pepper (about 1 large)
- 1 cup chopped red bell pepper (about 1 large)
- 4-6 jalapeño peppers (seeded and minced (adjust for heat))
- 6 cloves garlic (minced)
- 1/2 cup bottled lemon juice (not fresh, for consistent acidity)
- 1 tablespoon salt (canning or kosher, not iodized)
- 1 teaspoon ground cumin
- 1 teaspoon black pepper
- 1 tablespoon sugar (optional, to balance acidity)
- 1/2 cup chopped fresh cilantro (optional, added just before serving, not for canning)
Instructions
- Prepare your canning station: wash jars in hot soapy water, rinse, and keep them hot in the canner at 180°F. Place lids in a small saucepan of hot water (not boiling) to soften the seals.
- Peel the tomatoes: score a small X on the bottom of each tomato, blanch in boiling water for 45-60 seconds until the skin splits, then plunge into an ice water bath. Slip off the skins, core, and chop the tomatoes into 1/2-inch pieces. You need 8 cups of chopped tomatoes.
- In a large stainless steel or enamel pot (not aluminum, which reacts with acid), combine the chopped tomatoes, onions, bell peppers, jalapeños, garlic, lemon juice, salt, cumin, black pepper, and sugar if using. Do not add cilantro now — it will turn bitter and dark during processing.
- Bring the mixture to a boil over medium-high heat, stirring frequently to prevent sticking. Reduce heat and simmer for 10 minutes, stirring occasionally. The salsa will thicken slightly and the vegetables will soften.
- During simmering, prepare the water bath: fill the canner about half full with water, bring to a boil. Place the hot jars on a clean towel.
- Ladle the hot salsa into the hot jars using a wide-mouth funnel, leaving 1/2-inch headspace. Remove air bubbles by sliding a non-metallic spatula (or chopstick) around the inside of each jar. Wipe the jar rims with a clean, damp paper towel. Center a lid on each jar, then screw on the band until fingertip-tight.
- Using a jar lifter, place the filled jars into the boiling water bath, ensuring they are covered by at least 1 inch of water. Cover the canner, bring back to a full rolling boil, and process for 15 minutes (adjust for altitude: add 5 minutes if 1,001–3,000 ft, 10 minutes if 3,001–6,000 ft).
- After processing, turn off the heat, remove the canner lid, and let the jars sit for 5 minutes. Then lift them out onto a thick towel or wooden board, leaving at least 1 inch of space between jars. Do not tighten the bands.
- Let the jars cool undisturbed for 12-24 hours. You will hear the satisfying ping of lids sealing. After cooling, press the center of each lid — it should be concave and not flex. Any unsealed jars should be refrigerated and used within 2 weeks.
- Label the sealed jars with the date and store in a cool, dark place. For best quality, use within 12-18 months.