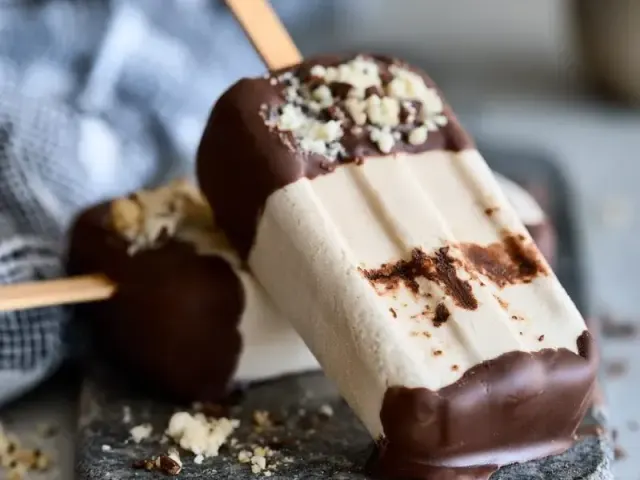
Chocolate-Dipped Ice Cream Bars: Crisp Shell, No Mess
There's something about a chocolate-dipped ice cream bar that feels like a special treat — that first bite where the shell cracks open and gives way to cold, creamy vanilla. But making them at home can be tricky. Either the chocolate turns out too thick, or it slides right off the ice cream in a sad, clumpy mess. I've been there, and after plenty of testing, I've landed on a method that delivers a thin, crisp shell every time. The trick? It's all in the chocolate-to-oil ratio and the temperature. Let me walk you through it.

The Right Chocolate for the Shell
Not all chocolate is created equal when it comes to dipping frozen treats. Chocolate chips are formulated to hold their shape when baked — they contain stabilizers that make the coating thick and pasty. For a thin, snappy shell, you want a good-quality chocolate bar (60–70% cacao), finely chopped. The finer the chop, the more evenly it melts. I keep the ratio at 4 parts chocolate to 1 part refined coconut oil by weight. That means for 12 ounces of chocolate, I use 3 tablespoons of oil. This gives a shell that sets hard in the freezer but cracks beautifully when you bite into it, without any greasy residue.
Why Temperature Matters
If the melted chocolate is too hot, it will melt the surface of the ice cream bar on contact, leaving you with a slushy coating that never sets properly. Too cool, and it thickens into a gloppy mess that won't coat evenly. The sweet spot is 85°F to 90°F. I use an instant-read thermometer (or just touch the bowl — it should feel barely warm, not hot). Let the melted chocolate rest for a few minutes after microwaving, stirring occasionally, until it reaches that range. This is the single most important step for a clean, professional-looking bar.
Making the Ice Cream Base
A simple no-churn base works perfectly here. Heavy cream and whole milk give a rich, scoopable texture that holds up well during dipping. I warm the cream, milk, sugar, vanilla, and salt just until the sugar dissolves — about 170°F — then pour it into a parchment-lined loaf pan. This base doesn't need an ice cream maker; the high fat content ensures a creamy result after freezing. Let it freeze for at least 6 hours, or overnight for best results. When it's fully firm, lift it out by the parchment overhang and cut it into 8 even bars. Place them on a parchment-lined baking sheet and pop them back in the freezer for 30 minutes. This extra chill is your insurance policy: cold bars mean the chocolate sets faster and stays put.
Dipping Without the Drip
Here's where technique meets patience. Work with only 2 or 3 bars at a time, keeping the rest in the freezer. Hold each bar by its stick (or use a fork if you're working without sticks) and dip it straight down into the melted chocolate. Tilt the bowl slightly so the chocolate pools on one side, then lift the bar and let the excess drip off for a few seconds. If you want to add sprinkles or chopped nuts, do it now — the shell sets in about 30 seconds. Place each finished bar back on the parchment and immediately return the sheet to the freezer. The shell will harden into a crackly, matte finish within about 10 minutes, but I let them freeze for at least an hour before serving.
Common Mistakes and Fixes
Shell too thick: You likely used chocolate chips or didn't add enough coconut oil. Switch to chopped bar chocolate and measure carefully.
Shell slides off: The chocolate was too warm, or the bars weren't cold enough. Cool the chocolate to 85°F and freeze bars for an extra 30 minutes before dipping.
Shell looks streaky: The chocolate wasn't fully melted and smooth. Stir until completely liquid, and strain through a fine-mesh sieve if needed.
Storing and Serving
Once the bars are fully frozen, transfer them to an airtight container with layers of parchment between them. They'll keep for up to 2 weeks without developing ice crystals. To serve, let them sit at room temperature for about 2 minutes — just enough to soften the shell slightly so it cracks cleanly, not shatters into a hundred pieces. This is purely a texture preference; they're perfectly fine straight from the freezer too.
A Few Variations
Swap the vanilla base for chocolate, coffee, or strawberry — just keep the cream-to-milk ratio the same for a stable texture. For a dairy-free version, use full-fat canned coconut milk in place of both the cream and milk. The chocolate shell works with any high-quality dark, milk, or white chocolate; just adjust the coconut oil as noted in the FAQ above. And if you're feeling fancy, a sprinkle of flaky sea salt on top of the dark chocolate shell is a lovely counterpoint to the sweetness.
These bars are a perfect make-ahead dessert for summer gatherings, birthday parties, or any time you want something cold and chocolatey without turning on the oven. The shell crackles, the ice cream is creamy, and every bite feels like a small celebration.
Frequently Asked Questions
Why does my chocolate shell crack when I bite into it?
That's actually the goal — a crisp shell that shatters cleanly. If yours is too thick or soft, you likely used chocolate chips (which have stabilizers) or didn't add enough coconut oil. Stick with chopped bar chocolate and the 4:1 ratio of chocolate to oil for the perfect thin crackle.
Can I use milk or white chocolate instead?
Yes, but adjust the coconut oil. Milk chocolate needs 2 tablespoons oil per 12 ounces, and white chocolate needs 2 1/2 tablespoons. Both are softer than dark, so the shell will be a bit less snappy. Freeze bars for at least 2 hours after dipping to firm up.
How do I prevent the chocolate from melting the ice cream?
The biggest mistake is using hot chocolate. Cool the melted chocolate to 85°F–90°F (barely warm to the touch). Also, work with only a few bars at a time, keeping the rest in the freezer. If the chocolate starts to thicken, reheat it gently for 5 seconds.
Can I make these without a mold or loaf pan?
Absolutely. Pour the ice cream base into a 9x9-inch baking dish lined with parchment, freeze until firm, then cut into squares and insert a popsicle stick into each. You'll get more of a square bar shape, which works just as well for dipping.
Chocolate-Dipped Ice Cream Bars

Creamy vanilla ice cream bars coated in a thin, crackly chocolate shell that stays crisp right out of the freezer.
- 8 (3-ounce) ice pop molds or 1 (9x5-inch) loaf pan
- parchment paper
- medium microwave-safe bowl
- whisk
- rimmed baking sheet
- offset spatula or butter knife
- 2 cups heavy cream
- 1 cup whole milk
- 3/4 cup granulated sugar
- 1 teaspoon vanilla extract
- 1/8 teaspoon fine sea salt
- 12 ounces semi-sweet chocolate (60-70% cacao, finely chopped)
- 3 tablespoons coconut oil (refined, for neutral flavor)
- Optional: 1/2 cup chopped toasted almonds or sprinkles
- If using a loaf pan, line it with parchment paper, leaving overhang on two sides. If using ice pop molds, insert sticks.
- In a medium saucepan, combine heavy cream, whole milk, sugar, vanilla, and salt. Warm over medium heat, stirring occasionally, until sugar dissolves and mixture is steaming but not boiling (about 170°F). Remove from heat.
- Pour the warm base into the prepared pan or molds. Freeze until solid, at least 6 hours or overnight.
- When the ice cream is fully frozen, line a rimmed baking sheet with parchment. Unmold the ice cream: if using a loaf pan, lift out with parchment overhang and cut into 8 even bars. Place bars on the baking sheet and return to freezer for 30 minutes.
- In a medium microwave-safe bowl, combine chopped chocolate and coconut oil. Microwave in 30-second bursts at 50% power, stirring after each, until melted and smooth (about 2 minutes total). Let cool to 85°F–90°F — it should feel just barely warm to the touch. This temperature is critical: too hot and it will melt the ice cream; too cool and it will thicken and clump.
- Working quickly, remove 2–3 bars from the freezer at a time. Hold a bar by its stick (or use a fork if no stick) and dip it into the melted chocolate, tilting the bowl to coat evenly. Let excess drip off for a few seconds, then place back on the parchment-lined sheet. If adding toppings, sprinkle them on immediately before the shell sets.
- Return the baking sheet to the freezer immediately. Freeze for at least 1 hour before serving. The chocolate shell will set into a crisp, snappy coating that doesn't stick to your fingers when you hold the bar.
Storage: Keep bars in an airtight container in the freezer for up to 2 weeks, separated by parchment paper. For a dairy-free version, substitute full-fat canned coconut milk for the cream and milk. The chocolate shell works with any high-quality chocolate bar (not chips, which contain stabilizers that prevent a thin shell). Common allergens: dairy, soy (in some chocolate). For specific dietary concerns, consult a qualified professional.
Recipe: Chocolate-Dipped Ice Cream Bars
Equipment
- 8 (3-ounce) ice pop molds or 1 (9x5-inch) loaf pan
- parchment paper
- medium microwave-safe bowl
- whisk
- rimmed baking sheet
- offset spatula or butter knife
Ingredients
- 2 cups heavy cream
- 1 cup whole milk
- 3/4 cup granulated sugar
- 1 teaspoon vanilla extract
- 1/8 teaspoon fine sea salt
- 12 ounces semi-sweet chocolate (60-70% cacao, finely chopped)
- 3 tablespoons coconut oil (refined, for neutral flavor)
- Optional: 1/2 cup chopped toasted almonds or sprinkles
Instructions
- If using a loaf pan, line it with parchment paper, leaving overhang on two sides. If using ice pop molds, insert sticks.
- In a medium saucepan, combine heavy cream, whole milk, sugar, vanilla, and salt. Warm over medium heat, stirring occasionally, until sugar dissolves and mixture is steaming but not boiling (about 170°F). Remove from heat.
- Pour the warm base into the prepared pan or molds. Freeze until solid, at least 6 hours or overnight.
- When the ice cream is fully frozen, line a rimmed baking sheet with parchment. Unmold the ice cream: if using a loaf pan, lift out with parchment overhang and cut into 8 even bars. Place bars on the baking sheet and return to freezer for 30 minutes.
- In a medium microwave-safe bowl, combine chopped chocolate and coconut oil. Microwave in 30-second bursts at 50% power, stirring after each, until melted and smooth (about 2 minutes total). Let cool to 85°F–90°F — it should feel just barely warm to the touch. This temperature is critical: too hot and it will melt the ice cream; too cool and it will thicken and clump.
- Working quickly, remove 2–3 bars from the freezer at a time. Hold a bar by its stick (or use a fork if no stick) and dip it into the melted chocolate, tilting the bowl to coat evenly. Let excess drip off for a few seconds, then place back on the parchment-lined sheet. If adding toppings, sprinkle them on immediately before the shell sets.
- Return the baking sheet to the freezer immediately. Freeze for at least 1 hour before serving. The chocolate shell will set into a crisp, snappy coating that doesn't stick to your fingers when you hold the bar.