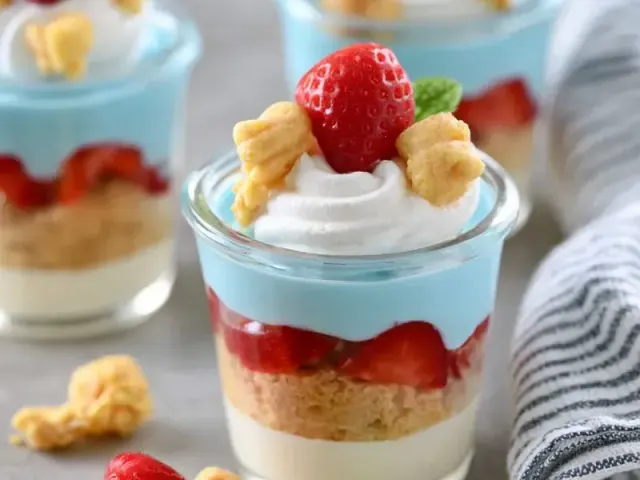
Kid-Friendly Summer Snack Cups: Easy DIY Lunchbox Ideas
There’s something about a hot summer afternoon that makes a cold, creamy snack feel like a little gift. When my own kids come running in from the sprinkler, sticky and grinning, they want something that cools them down fast — but also fills them up. That’s how these kid-friendly summer snack cups came together in my kitchen. They’re not just a treat; they’re a tool for keeping little hands busy and little bellies happy.

The trick is in the ratio. I keep the yogurt-to-crunch ratio at 2:1 by volume — two parts creamy base to one part crunchy topping. That gives each cup enough structure to hold up in a lunchbox or on a picnic blanket, without turning into a soggy mess. And the best part? Kids can layer their own cups. It’s a no-cook activity that builds a snack they’ll actually eat.
Why These Snack Cups Work for Summer
Summer heat makes heavy snacks unappealing. A cold yogurt base hits the spot, but it needs staying power. That’s where the granola and fruit come in. The granola provides complex carbs and a little protein, while the berries add natural sweetness and a pop of color. The whole package stays chilled for hours if you pack it with an ice pack. No melting, no mess.
I use plain whole-milk yogurt here — not Greek, not nonfat. Whole-milk yogurt has a creamier texture that doesn’t separate when you stir in honey. It also keeps kids full longer because of the fat content. If you prefer Greek, thin it with a tablespoon of milk so it layers smoothly without clumping.
The Exact Technique for Perfect Layers
Start with a small bowl. Whisk together 2 cups of plain whole-milk yogurt, 2 tablespoons of honey (or maple syrup for a vegan option), and 1/2 teaspoon of vanilla extract. Taste it. It should be sweet but not cloying — the berries will add their own sugar later.
Now, grab four 6-ounce cups. They need to be clear so kids can see the layers. Mason jars work great, but any small container with a tight lid will do. Spoon 1/4 cup of the yogurt mixture into the bottom of each cup. That’s your foundation.
Next comes the crunch. Sprinkle 2 tablespoons of granola over the yogurt. I use a granola with small clusters — if yours has big chunks, crush them slightly in your hand. Big pieces are hard for little mouths and create air pockets that make the layers shift. Then add 2 tablespoons of fresh berries. Blueberries and raspberries hold their shape best. Strawberries should be chopped into pea-sized pieces so they don’t slide around.
If you’re adding mini chocolate chips or coconut flakes, sprinkle 1 tablespoon now. Then repeat the layers: another 1/4 cup yogurt, the remaining granola, berries, and any extras. The double layer gives each cup a satisfying mix of textures from top to bottom.
The Common Mistake to Avoid
Don’t stir the layers together. I know it’s tempting to mix everything in one bowl and call it a day, but that turns the granola into a soggy paste within minutes. Layering keeps the crunch separate until the moment your child digs in. If you’re prepping these cups the night before, store the granola in a separate small bag and let your kids sprinkle it on just before eating. That way, every bite stays crisp.
Customizing for Allergies and Preferences
These cups are endlessly adaptable. For nut-free kitchens, swap standard granola with one made from oats, seeds, and dried fruit. Many store-bought granolas are processed on shared equipment with nuts, so read labels carefully or make your own. For dairy-free, use a thick coconut or oat yogurt — just be sure it’s plain and unsweetened, then add your own sweetener.
If your child has a sensitivity to honey (not recommended under age 1), use maple syrup or a tiny pinch of stevia. For a lower-sugar version, skip the sweetener entirely and rely on very ripe berries for sweetness. The yogurt itself will still taste creamy and satisfying.
Food Safety and Storage Notes
These snack cups are best eaten within 4 hours of assembly if they contain fresh berries and yogurt. For lunchbox packing, keep them chilled with an ice pack. If you’re sending them to daycare or camp, pack the granola separately and let the child add it at snack time. This prevents the granola from getting soft and also keeps the cup from spilling if the lid isn’t tight.
Always supervise young children with small fruits like blueberries and chocolate chips to reduce choking risk. If you’re preparing these for a toddler, mash the berries slightly or use thinly sliced strawberries instead.
A Quick Takeaway
These kid-friendly summer snack cups are more than a recipe — they’re a system. The 2:1 yogurt-to-crunch ratio gives you a blueprint you can repeat with different fruits, granolas, and add-ins all summer long. Cold, creamy, crunchy, and sweet enough to feel like a treat, they’ll disappear as fast as the kids can grab them. And that’s exactly the point.
Frequently Asked Questions
How long do these snack cups last in the fridge?
They stay fresh for up to 24 hours, but the granola will soften over time. For the best crunch, add granola just before serving or pack it separately.
Can I use flavored yogurt instead of plain?
Yes, but reduce or skip the added sweetener. Flavored yogurts often contain extra sugar, which can make the cups too sweet. I prefer plain so the kids can control the sweetness.
What are good nut-free granola options?
Look for granola made with oats, seeds (pumpkin, sunflower), and dried fruit. You can also make your own by baking oats with a little oil and maple syrup at 350°F for 10 minutes.
Can I make these dairy-free?
Absolutely. Use a thick dairy-free yogurt like coconut or oat-based. Just be sure it’s plain and unsweetened, then add honey or maple syrup to taste.
DIY Yogurt & Crunch Snack Cups

A simple, customizable snack cup with a creamy yogurt base and a crunchy topping layer, designed for kids to assemble or grab on the go.
- 4 small (6-ounce) cups or jars with lids
- small mixing bowl
- measuring spoons
- spoon for layering
- 2 cups plain whole-milk yogurt (or Greek yogurt)
- 2 tablespoons honey or maple syrup
- 1/2 teaspoon vanilla extract
- 1 cup crunchy granola (no large clusters, or crush them slightly)
- 1/2 cup fresh berries (blueberries, raspberries, or chopped strawberries)
- 1/4 cup mini chocolate chips or unsweetened coconut flakes (optional)
- In a small bowl, whisk together the yogurt, honey, and vanilla until smooth. Taste and adjust sweetness if needed.
- To each cup, add 1/4 cup of the yogurt mixture as the bottom layer.
- Sprinkle 2 tablespoons of granola over the yogurt in each cup.
- Add 2 tablespoons of fresh berries on top of the granola.
- If using, sprinkle 1 tablespoon of chocolate chips or coconut over the berries.
- Repeat layers once more: another 1/4 cup yogurt, then remaining granola, berries, and any extras.
- Seal each cup with a lid and refrigerate for at least 30 minutes before serving. This lets the granola soften slightly without turning mushy.
For best texture, serve within 4 hours of making. If packing for later, store the granola separately and add just before eating. Keep cups chilled until serving. For nut-free options, use seed-based granola. For dairy-free, use coconut or oat yogurt. Always supervise young children with small berries and chocolate chips to prevent choking.
Recipe: DIY Yogurt & Crunch Snack Cups
Equipment
- 4 small (6-ounce) cups or jars with lids
- small mixing bowl
- measuring spoons
- spoon for layering
Ingredients
- 2 cups plain whole-milk yogurt (or Greek yogurt)
- 2 tablespoons honey or maple syrup
- 1/2 teaspoon vanilla extract
- 1 cup crunchy granola (no large clusters, or crush them slightly)
- 1/2 cup fresh berries (blueberries, raspberries, or chopped strawberries)
- 1/4 cup mini chocolate chips or unsweetened coconut flakes (optional)
Instructions
- In a small bowl, whisk together the yogurt, honey, and vanilla until smooth. Taste and adjust sweetness if needed.
- To each cup, add 1/4 cup of the yogurt mixture as the bottom layer.
- Sprinkle 2 tablespoons of granola over the yogurt in each cup.
- Add 2 tablespoons of fresh berries on top of the granola.
- If using, sprinkle 1 tablespoon of chocolate chips or coconut over the berries.
- Repeat layers once more: another 1/4 cup yogurt, then remaining granola, berries, and any extras.
- Seal each cup with a lid and refrigerate for at least 30 minutes before serving. This lets the granola soften slightly without turning mushy.