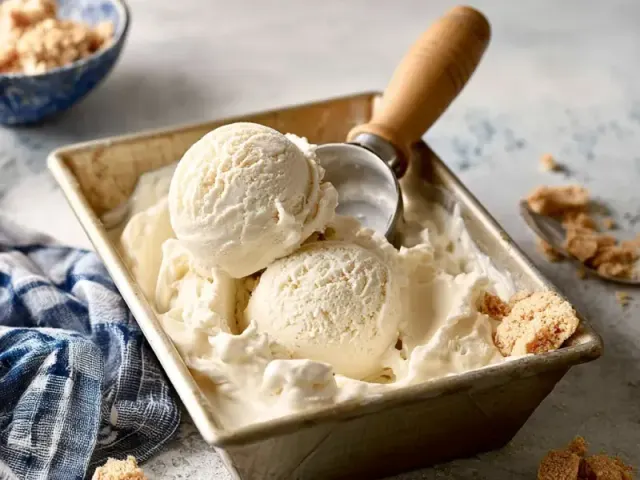
No-Churn Vanilla Ice Cream: Silky, Simple, and Egg-Free
There's something about the first scoop of homemade vanilla ice cream — the way it glides off the spoon, the tiny specks of vanilla bean suspended in a cloud of cream. No machine required. Just a bowl, a whisk, and a little patience.

Most no-churn recipes rely on sweetened condensed milk, and that's a good start. But the real secret is in the ratio and the folding technique. I keep the ratio at exactly 2 cups of heavy cream to one 14-ounce can of condensed milk. That's the sweet spot: enough fat to stay creamy, enough sugar to lower the freezing point without cloying sweetness. And the vanilla? Pure extract, not imitation. Two teaspoons is non-negotiable.
Why This Method Works (and What Can Go Wrong)
The science is simple. Heavy cream whips into a foam, trapping air. Sweetened condensed milk coats those air bubbles, protecting them from ice crystals as the mixture freezes. No churning needed — the air is already there.
The most common mistake? Over-whipping or over-folding. Whipped cream should reach stiff peaks — when you lift the beaters, the peaks stand straight up, not flopping over. If you keep going, the cream turns grainy, then buttery. Stop at stiff, glossy peaks. And when you fold in the condensed milk, use a light hand. Cut through the center, scrape the sides, and rotate the bowl. Ten strokes should do it. Any more, and you deflate the air that makes the ice cream scoopable.
Chilling Your Tools: A Small Step That Matters
Pop your mixing bowl and beaters in the freezer for 10 minutes before you start. Cold metal helps the cream whip faster and reach a higher volume. Room-temperature cream in a warm bowl takes forever and never quite gets stiff enough. That extra chill is the difference between a light, airy base and a flat one.
The Right Vanilla Matters
Vanilla is the star here. Pure vanilla extract brings floral, fruity notes that imitation vanilla can't match. If you want to go all in, scrape the seeds from half a vanilla bean and whisk them into the sweetened condensed milk before folding. The speckles look beautiful and the flavor deepens over a day or two in the freezer.
Texture Tips for Perfect Scoopability
Even with the right technique, no-churn ice cream can freeze rock-hard if your freezer runs cold. A few tricks: Add one tablespoon of vodka or corn syrup to the cream before whipping. Both lower the freezing point slightly, making the ice cream softer straight from the freezer. Don't worry — you won't taste either. And always press plastic wrap directly onto the surface before sealing. That barrier stops ice crystals from forming on top.
How to Serve and Store
Let the ice cream sit at room temperature for 5 to 10 minutes before scooping. A warm, dry ice cream scoop helps, too. Run it under hot water for a few seconds, then wipe it dry. The first scoop will come out clean.
Store leftovers with the plastic wrap pressed onto the surface and the lid tight. It keeps well for up to two weeks — if it lasts that long.
Dietary Notes
This recipe contains dairy. For a dairy-free version, substitute full-fat coconut cream (chilled overnight) for heavy cream and use sweetened condensed coconut milk. The texture will be slightly less creamy but still delicious. For specific dietary concerns, consult a qualified professional.
Takeaway
No-churn vanilla ice cream is about mastering two things: stiff peaks and gentle folds. That's it. The reward is a silky, pure vanilla flavor that tastes like summer in a bowl — no machine, no fuss, just good technique.
Frequently Asked Questions
Why did my no-churn vanilla ice cream turn out icy?
Icy texture usually comes from over-folding the whipped cream, which deflates the air bubbles, or from not pressing plastic wrap onto the surface. Air is what keeps ice cream creamy, so fold gently and seal tightly. Also, make sure your sweetened condensed milk is fresh; older cans can crystallize and cause graininess.
Can I use light cream or half-and-half instead of heavy cream?
No, heavy cream with at least 36% milkfat is essential. Lower-fat creams don't whip to stiff peaks and will result in a thin, icy base. The fat content stabilizes the air and creates that silky mouthfeel.
How do I make this no-churn vanilla ice cream without a hand mixer?
You can whisk by hand, but it will take 10-15 minutes of vigorous whisking. A chilled bowl and cold cream speed things up. For the best results, use a stand mixer or hand mixer to get stiff peaks without fatiguing your arm.
Can I add mix-ins like chocolate chips or fruit?
Yes, fold in up to 1 cup of mix-ins after combining the cream and condensed milk. For fruit, use dried or freeze-dried to avoid adding extra water, which causes ice crystals. If using fresh fruit, macerate it with sugar first and drain excess liquid.
No-Churn Vanilla Ice Cream

A creamy, egg-free vanilla ice cream made with just four ingredients and no ice cream maker. The key is whipping cream to stiff peaks and folding gently for a silky, scoopable texture.
- large mixing bowl
- hand mixer or stand mixer
- rubber spatula
- 9x5-inch loaf pan or 2-quart container
- plastic wrap or lid
- 2 cups heavy cream (36-40% milkfat, cold)
- 1 14-ounce can sweetened condensed milk
- 2 teaspoons pure vanilla extract
- 1/8 teaspoon fine sea salt
- Place a large mixing bowl and beaters in the freezer for 10 minutes. This helps the cream whip faster and hold its shape.
- In the chilled bowl, combine the heavy cream, vanilla extract, and salt. Beat on medium speed until soft peaks form, about 2 minutes. Increase to high speed and beat until stiff peaks stand upright when the beaters are lifted, about 1-2 more minutes. Do not overbeat; if the cream looks grainy or curdled, you've gone too far.
- Pour the sweetened condensed milk into a separate bowl. Gently fold one-third of the whipped cream into the condensed milk until just combined. This lightens the mixture.
- Pour the lightened mixture back into the remaining whipped cream. Fold gently with a rubber spatula, cutting through the center and scraping the sides, until no white streaks remain. Over-folding will deflate the air, making the ice cream dense.
- Transfer the mixture to a 9x5-inch loaf pan or a 2-quart freezer-safe container. Smooth the top with the spatula. Press a piece of plastic wrap directly onto the surface to prevent ice crystals, then cover with a lid or more wrap.
- Freeze for at least 6 hours, or overnight, until firm. For the best texture, let it sit at room temperature for 5-10 minutes before scooping.
Storage: Keep in an airtight container in the freezer for up to 2 weeks. Press plastic wrap onto the surface each time to prevent freezer burn. For a softer texture, add 1 tablespoon of vodka or corn syrup when mixing the cream; this lowers the freezing point slightly. Common allergens: dairy. For a dairy-free version, use full-fat coconut cream (chilled) and sweetened condensed coconut milk, but note that texture will be less creamy. Always handle beaters and bowls safely when using electric mixers.