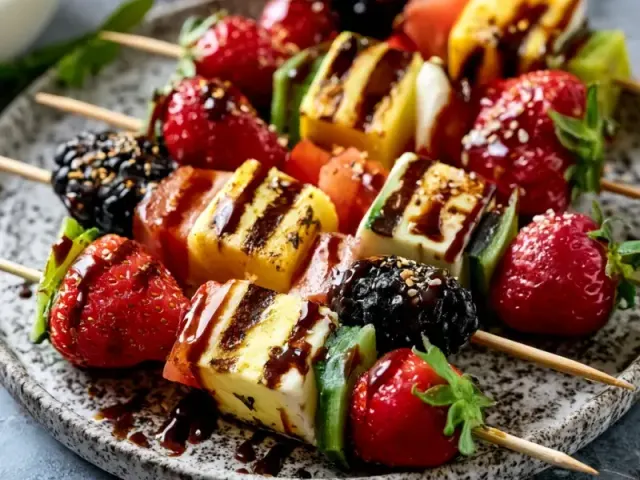
Summer Fun Snack Skewers: Easy, Customizable Party Bites
The first time I made these skewers for a backyard get-together, I noticed something: people gravitate toward food they can pick up and eat in two bites. No plates, no forks, no fuss. That's the magic of a well-built snack skewer—it's portable, colorful, and endlessly adaptable. Whether you're hosting a pool party, packing a picnic, or just want a quick after-school snack, these Summer Fun Snack Skewers deliver a balanced mix of sweet, salty, and crunchy in every bite.

Why This Skewer Works
The key is contrast. I keep the ratio at roughly one-third fruit, one-third cheese or protein, and one-third crunchy vegetables. That balance ensures each skewer feels satisfying, not one-note. For example, a grape pairs with a cube of sharp cheddar and a folded salami slice—the sweetness of the fruit cuts the saltiness of the meat, while the cheese adds creaminess. The cucumber round brings a cool, crisp finish. This isn't random threading; it's intentional pairing.
Choosing Your Ingredients
Stick with ingredients that hold their shape at room temperature for a couple of hours. Here's what I reach for:
- Fruit: Red grapes (no slicing needed), strawberries (halved), or melon balls. Avoid overly ripe bananas or soft berries that mush.
- Cheese: Cubed cheddar, Gouda, or pepper jack. Cut into 1/2-inch cubes—too small and they fall off, too large and they dominate.
- Protein: Folded salami, prosciutto slices, or cooked chicken cubes. Keep meat pieces uniform for even threading.
- Crunch: Cucumber rounds, cherry tomatoes, or bell pepper squares. English cucumbers are ideal because they're less watery and hold up better.
One common mistake: mixing wet ingredients (like freshly washed berries) with cheese too early. The moisture can make cheese slippery. Pat all produce dry with a paper towel before threading.
Assembly Technique
Soak wooden skewers in water for 10 minutes if you're using them for an outdoor party that lasts more than an hour. This prevents splintering and keeps the wood from absorbing moisture from the food. For shorter events, you can skip this step.
Thread in a repeating pattern: start with a grape (it's round and won't slide off), then cheese, folded salami, tomato, cucumber, and strawberry. Repeat once or twice per skewer, leaving a 1-inch handle at the bottom for easy grabbing. Don't overcrowd—leave a tiny gap between pieces so they don't squish each other.
If you're making these for kids, use short skewers (about 6 inches) and blunter ends. You can also cut the skewer tips off with kitchen shears for safety.
Make It Your Own
This base recipe is a template. Swap in whatever you have: mozzarella balls instead of cheddar, turkey instead of salami, or pineapple chunks instead of grapes. For a vegetarian version, skip the meat and double up on cheese and olives. For a dairy-free option, use cucumber and extra fruit.
One of my favorite variations: drizzle the finished skewers with a balsamic glaze (just a thin line) for a sweet-tangy finish. Do this right before serving so the glaze doesn't make everything sticky.
How to Serve and Store
Arrange skewers on a large platter in a fan pattern or a circular wheel. Garnish with fresh basil or mint leaves for color. If you're serving outdoors, place the platter in a shallow dish of ice to keep ingredients cool.
These skewers are best within 2 hours of assembly. If you have leftovers, store them in an airtight container in the fridge for up to 1 day. Note that strawberries and tomatoes may soften and release juice, so the texture won't be as crisp the next day. For best results, assemble only what you'll eat.
A Quick Note on Food Safety
If you're using cheese or deli meat, keep the skewers refrigerated until serving. At a picnic or outdoor party, don't leave them out for more than 2 hours (or 1 hour if the temperature is above 90°F). When in doubt, place the platter on a bed of ice.
Takeaway
Summer Fun Snack Skewers are less a recipe and more a method—a way to turn simple ingredients into something people can't stop reaching for. Once you understand the balance of textures and the order of threading, you can adapt this to any occasion. That's the real skill. And the best part? No oven, no stove, no mess. Just a cutting board and a few skewers.
Frequently Asked Questions
Can I make these skewers ahead of time?
Yes, assemble them up to 2 hours ahead and keep covered with damp paper towel in the fridge. For best texture, add softer fruits like strawberries just before serving.
What are the best cheese options for skewers?
Firm cheeses like cheddar, Gouda, or Monterey Jack hold their shape well. Avoid soft cheeses that can squish or slide off.
How do I keep the ingredients from sliding off?
Thread items snugly but not too tight. Use a slightly thicker ingredient like a cheese cube at the base to anchor the skewer. Leave a small handle at the bottom.
Can I use metal skewers instead of wooden?
Yes, metal skewers work fine. They are reusable and don't need soaking. Just be careful of sharp ends.
What if I have picky eaters?
Let everyone build their own skewer from a bowl of ingredients. It's interactive and ensures each person gets what they like.
Summer Fun Snack Skewers

Customizable skewers with fruit, cheese, deli meat, and crunchy bites, perfect for summer gatherings.
- 8-inch wooden skewers (or short skewers)
- cutting board
- sharp knife
- small cookie cutters (optional)
- 8 wooden skewers (short, about 6 inches)
- 1 cup seedless red grapes
- 1 cup fresh strawberries (hulled and halved)
- 1 cup cheddar cheese cubes (1/2-inch)
- 1 cup cooked salami slices (folded into quarters)
- 1 cup cherry tomatoes
- 1 cup cucumber rounds (1/4-inch thick, from an English cucumber)
- Optional: 1/2 cup pitted olives (1/2 cup fresh basil leaves)
- Soak wooden skewers in water for 10 minutes if using for a long event—this prevents splintering. Pat dry.
- Wash and prep all produce: halve strawberries, slice cucumber into rounds, and cut cheese into uniform cubes.
- Fold each salami slice into a compact quarter-circle for easy threading.
- Thread ingredients onto each skewer in a repeating pattern: start with a grape, then cheese, folded salami, tomato, cucumber round, and strawberry. Repeat once or twice per skewer, leaving a 1-inch handle at the bottom.
- For a visual finish, alternate colors—red, white, green—for a festive look.
- Place skewers on a platter, cover with damp paper towel, and refrigerate until serving (up to 2 hours).
Storage: Best served within 2 hours. Refrigerate leftovers in an airtight container for up to 1 day—fruits may soften. For a dairy-free version, skip cheese and use extra cucumber or olives. Common allergens: dairy (cheese). Always use a sharp knife for cutting produce. For a nut-free option, avoid adding any nuts.