
The first thing you notice when a proper lemon pound cake comes out of the oven is the smell. It’s sharp and sweet at the same time, filling the kitchen with something that feels like sunshine. The top has cracked open in a jagged line, and the edges are just starting to pull away from the pan. That crack is a good sign—it means the batter was aerated well, and the cake will be tender inside.

This recipe is built around a simple but crucial ratio: equal weights of butter, sugar, and flour, with eggs and liquid scaled to balance the crumb. The lemon here isn’t just flavor—it’s chemistry. The acid in the lemon juice reacts with the baking powder to give lift, while the buttermilk keeps the crumb moist and fine. I use a 1:1:1 ratio by weight for the butter, sugar, and flour, then add enough liquid to make a thick, scoopable batter. That’s the key to a pound cake that’s dense but not heavy, tender but not crumbly.
Choosing Your Ingredients
Use unsalted butter here. Salted butter can vary in salt content, and you want control over the final seasoning. Soften the butter to about 65°F—it should give slightly when pressed but still hold its shape. If it’s too soft, the cake will spread and be greasy. Eggs and buttermilk should be at room temperature too. Cold ingredients will seize the butter and create a lumpy batter that bakes unevenly.
For the lemons, go for unwaxed organic if you can find them. You’ll be using the zest, and you don’t want a waxy residue. Zest the lemons before juicing—it’s easier that way. A microplane gives the finest zest, which melts into the batter. Avoid the white pith; it’s bitter.
The Creaming Method: No Shortcuts
This is the most important technique in the recipe. Creaming means beating the butter and sugar together until the mixture is pale, light, and fluffy. It should take a full 4 to 5 minutes with a stand mixer on medium speed. You’re mechanically incorporating air into the butter, which will expand in the oven and give the cake its structure. Scrape the bowl down halfway through to make sure everything is even.
Add the eggs one at a time, beating for about 30 seconds after each. If the mixture looks curdled at this stage, it means the butter was too cold or the eggs were too cold. Don’t panic—it will usually come together once the flour goes in, but the crumb may be slightly denser.
Alternating Dry and Wet Ingredients
This is where many recipes go wrong. You add the flour mixture in three parts, alternating with the buttermilk and lemon juice. Start with flour, then half the liquid, then flour, then remaining liquid, then flour. This method prevents the batter from separating and keeps the gluten development low. Mix on low speed just until the flour disappears. Overmixing develops gluten, which makes the cake tough and chewy. The final batter should be thick, smooth, and slightly glossy.
Baking and Temperature Control
Bake at 325°F, not 350°F. The lower temperature allows the center to cook through before the edges dry out. Place the pan on the middle rack. After 40 minutes, check the top. If it’s browning too fast, loosely tent with aluminum foil. The cake is done when a toothpick inserted into the center comes out clean or with a few moist crumbs. The internal temperature should be around 210°F. Let it cool in the pan for exactly 15 minutes, then turn it out onto a wire rack. If you leave it longer, the bottom will steam and become soggy.
The Glaze: Simple and Bright
The glaze is a straight ratio of powdered sugar to lemon juice. Start with 2 tablespoons of juice for 1 cup of sugar. Whisk until smooth. It should be thick enough to coat the back of a spoon but runny enough to drizzle. If it’s too thick, add a few drops more juice. If too thin, add a tablespoon more sugar. Wait until the cake is completely cool before glazing—otherwise the glaze will melt and soak in, leaving a sticky mess. Let the glaze set for at least 15 minutes before slicing.
Common Mistakes to Avoid
- Skipping the flour dusting on the pan: Even with non-stick spray, a dusting of flour ensures the cake releases cleanly. Use a tablespoon of flour and tap out the excess.
- Using cold eggs: This causes the butter to seize. If you forget to take eggs out, place them in a bowl of warm water for 5 minutes.
- Overmixing the batter: Stop as soon as the flour disappears. A few streaks are fine.
- Cutting while warm: The crumb is too tender when warm and will crumble. Patience pays off.
Storing and Serving
Store the glazed cake in an airtight container at room temperature for up to 3 days. If you’re making it ahead, skip the glaze, wrap the cooled cake tightly in plastic wrap and foil, and freeze for up to 3 months. Thaw overnight in the fridge, then glaze before serving. Slice with a serrated knife using a gentle sawing motion to avoid crushing the crumb.
Takeaway
A great lemon pound cake doesn’t need fussy ingredients or complicated steps. It needs attention to temperature, a proper creaming method, and an understanding of how the acid and fat work together. When you get that crack on top and the glaze sets into a shiny shell, you’ll know it was worth every minute. Serve it with a cup of black tea or a dollop of whipped cream—or just eat it standing at the counter, still warm from the oven. That’s the real test.
Frequently Asked Questions
Why is my lemon pound cake dry?
The most common cause is overbaking. Check the cake at 50 minutes; the internal temperature should be about 210°F (99°C) when done. Also, ensure your butter and eggs are at room temperature—cold ingredients don’t emulsify properly, leading to a dry crumb.
Can I use lemon extract instead of fresh lemon juice?
I don’t recommend it. Fresh lemon juice provides acidity that reacts with the baking powder for lift, plus a bright, clean flavor. Lemon extract can taste artificial. If you must substitute, use 1 teaspoon of lemon extract and reduce the vanilla to ½ teaspoon, but the texture will be slightly different.
How do I get a crack on top of my pound cake?
That signature crack comes from the batter rising quickly and the top setting. Using a 325°F (163°C) oven and creaming the butter and sugar thoroughly encourages a good crack. If you don’t get one, the cake is still fine—just not as picturesque.
Can I make this into a bundt cake?
Yes. Grease and flour a 10-cup bundt pan. Bake at 325°F (163°C) for 45-55 minutes. The glaze may need to be doubled to cover the larger surface area. Check for doneness with a toothpick as above.
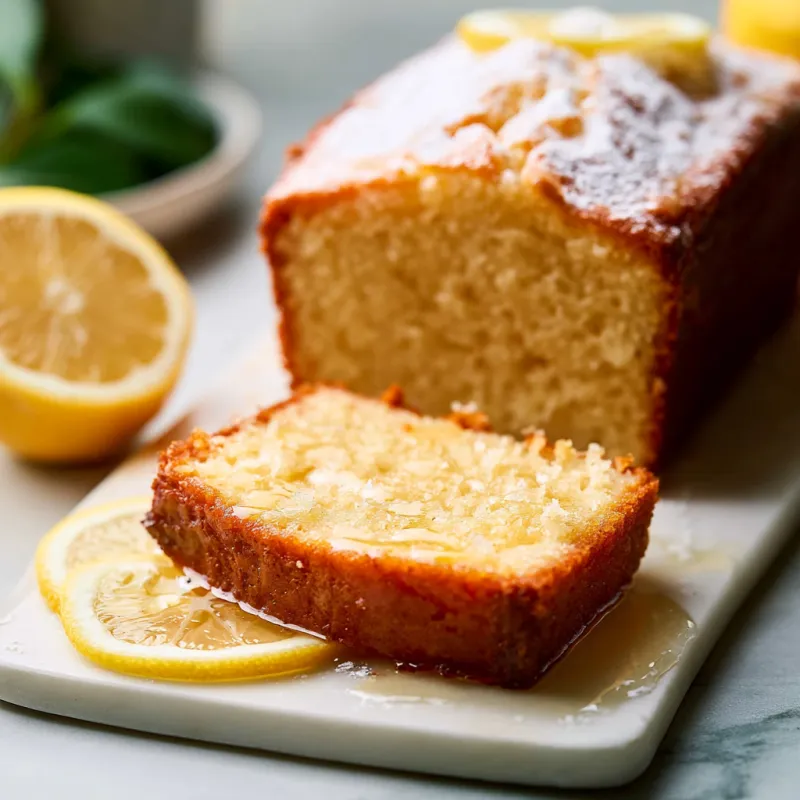
Lemon Pound Cake
Ingredients
Equipment
Method
- Preheat your oven to 325°F (163°C). Grease a 9x5-inch loaf pan thoroughly with butter or non-stick spray, then dust with flour, tapping out the excess. This ensures the cake releases cleanly.
- In a medium bowl, whisk together the flour, baking powder, and salt. Set aside.
- In a large bowl (or stand mixer fitted with the paddle attachment), beat the softened butter and granulated sugar on medium speed for 4-5 minutes, until light and fluffy. Scrape down the bowl once. This is the creaming step—don't rush it; it builds the cake's structure.
- Add the eggs one at a time, beating well after each addition (about 30 seconds each). Then beat in the lemon zest and vanilla extract until combined.
- With the mixer on low speed, add the flour mixture in three additions, alternating with the buttermilk and fresh lemon juice. Start and end with the flour. Mix just until the flour disappears—overmixing will make the cake tough. The batter will be thick and slightly glossy.
- Pour the batter into the prepared pan and spread it even. Bake for 50-60 minutes, until a toothpick inserted into the center comes out clean or with a few moist crumbs. The top should be golden brown and cracked. If the top browns too quickly (after 40 minutes), loosely tent with foil.
- Let the cake cool in the pan on a wire rack for 15 minutes. Then run a knife around the edges and turn the cake out onto the rack to cool completely, about 1 hour. Do not glaze while warm—the glaze will melt and soak in.
- For the glaze: whisk together powdered sugar and 2 tablespoons of lemon juice until smooth. Add more juice if needed for a pourable consistency. Stir in lemon zest if desired. Drizzle over the cooled cake. Let the glaze set for at least 15 minutes before slicing.