
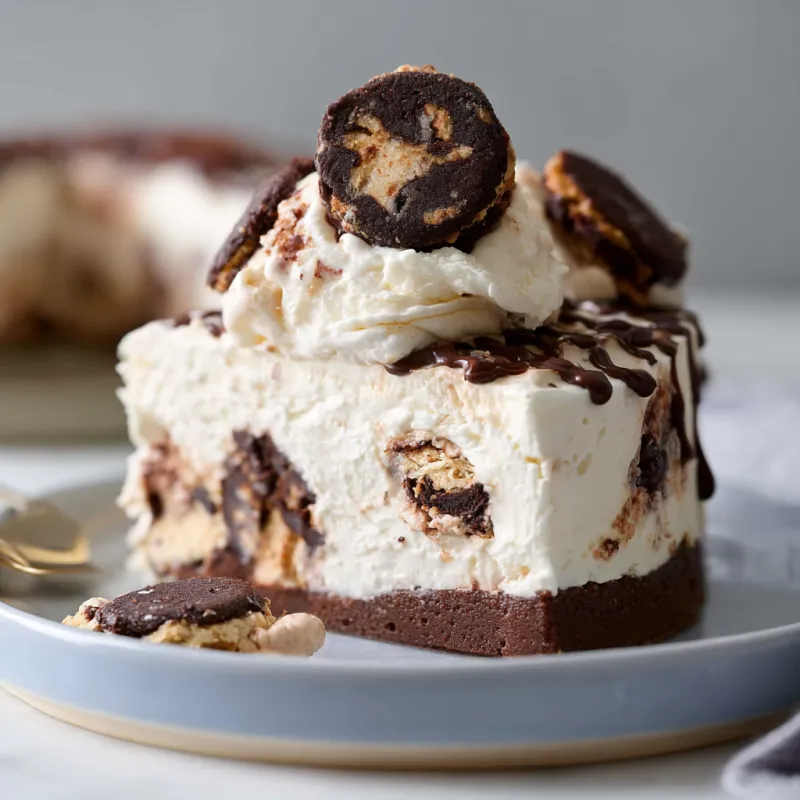
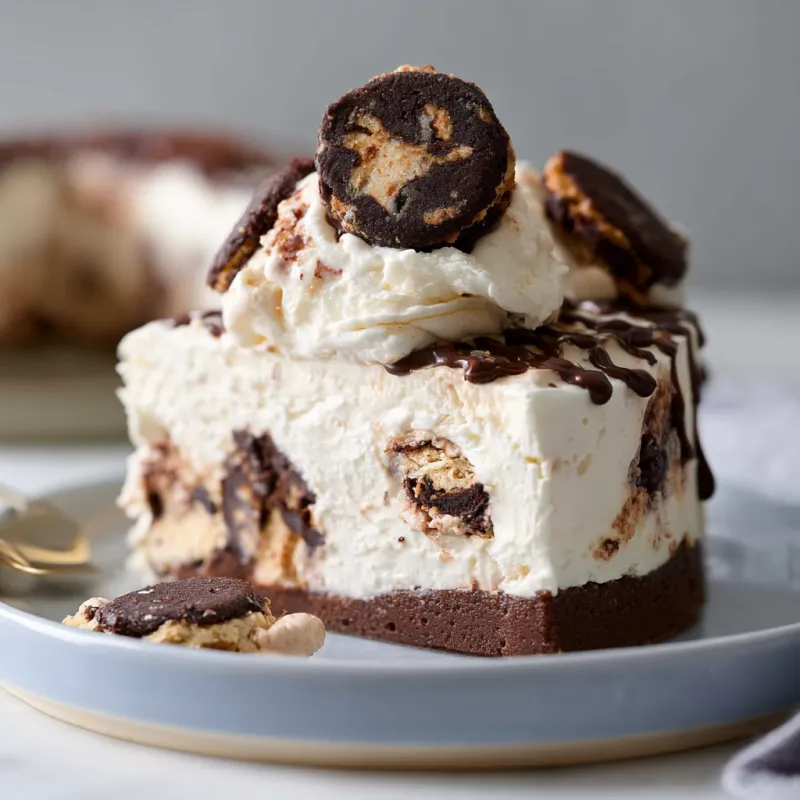
The first time I made a no-churn ice cream cake, I was after something that wouldn’t demand an ice cream maker or a complicated custard. What I found was a base so stable and creamy that it slices cleanly straight from the freezer—no melting puddle, no icy crunch. The secret is the ratio of sweetened condensed milk to whipped cream: too much condensed milk and the cake freezes rock-hard; too little and it turns icy. I keep the ratio at exactly 1 part condensed milk to 2 parts heavy cream by volume. That balance gives you a scoopable, sliceable texture that holds its shape on a plate for a good ten minutes before it starts to soften.

Why This Method Works
The magic of no-churn ice cream lies in the air you whip into the cream. Stiff peaks mean tiny, stable air bubbles that expand when frozen, creating a light, creamy crumb. The condensed milk adds sweetness and body without the need for eggs or cooking. For this cake, I layer that base over a pressed chocolate wafer crust—one that stays crisp because it’s fully frozen before the cream goes on. The fudge ripple is optional, but I include it because it breaks up the sweetness with a slightly bitter cocoa note.
Key Techniques for a Sliceable Cake
Getting the Crust Right
Chocolate wafers are my first choice—they’re dry and crumbly, so they absorb butter without turning soggy. If you use graham crackers, you’ll need a bit less butter because they’re more absorbent. Press the crumb mixture firmly into the pan using the bottom of a measuring cup. Then freeze it for a full 15 minutes. That step is non-negotiable: a warm crust will merge with the cream base, leaving you with a muddy layer instead of a clean crunch.
Whipping the Cream to the Perfect Point
Cold cream is essential. I chill the bowl and whisk attachment in the freezer for 10 minutes before starting. Whip on medium-high until the cream holds a peak that stands straight up when you lift the whisk. Stop immediately—if you keep going, the cream will separate into butter and buttermilk. The visual cue: the cream should look billowy and matte, not glossy and slick. Glossy means it’s still soft; matte means it’s stiff.
Folding Without Deflating
Folding is where most home bakers lose volume. I use a large rubber spatula and cut down through the center of the bowl, then sweep along the bottom and up the side, turning the bowl a quarter turn with each fold. I stop as soon as the last white streak disappears. Overfolding turns your light, airy base into a dense, heavy one.
Building the Layers
Spread half the cream mixture over the frozen crust. Drop the fudge ripple in small spoonfuls—about six to eight evenly spaced dots—then drag a knife through them in a figure-eight pattern. Don’t overswirl or you’ll lose the distinct ribbons. Add the remaining cream, smooth the top with an offset spatula, and repeat the fudge swirl on top. Cover tightly with plastic wrap pressed directly onto the surface to prevent freezer burn and ice crystals.
Freezing and Serving
Six hours is the minimum; overnight is better. The cake needs to be fully frozen through the center. When you’re ready to serve, run a thin knife around the edge, release the springform, and let the cake sit for 5–10 minutes. That brief rest softens the outer edge just enough for a clean cut without melting the interior. Use a hot, dry knife and wipe it between slices. The result: a crisp crust, creamy interior, and fudge ribbons that snap cleanly.
Common Mistake to Avoid
The biggest pitfall is skimping on the freeze time. If the cake isn’t solid, it will slump when you cut it. Another is using low-fat cream—it won’t whip properly and will yield a watery, icy texture. Stick with heavy cream (36% milk fat or higher).
Takeaway
This no-churn ice cream cake is a workhorse recipe. It’s forgiving enough for a beginner, but the technique—properly whipped cream, a frozen crust, and a balanced ratio—gives you a dessert that looks and tastes like it came from a bakery. Make it a day ahead, and you’ll have a stress-free showstopper for any gathering.
Frequently Asked Questions
Can I use a different crust?
Yes. Graham cracker crumbs, vanilla wafer crumbs, or crushed shortbread cookies all work. Use the same ratio: 1 ½ cups crumbs to 6 tablespoons melted butter. Press firmly and freeze.
Why did my ice cream cake turn icy?
Icy texture usually means the cream was underwhipped (not stiff enough to trap air) or the base was overmixed, deflating the air. Also, if the cake sits uncovered in the freezer, it can develop ice crystals. Always wrap tightly in plastic wrap.
How do I get clean slices?
Use a long, sharp knife run under hot water and wiped dry between each cut. Let the cake sit at room temperature for 5–10 minutes before slicing—it should offer slight resistance but not be rock hard.
Can I add fruit or other mix-ins?
Absolutely. Fold in up to 1 cup of chopped fresh berries, crushed cookies, or toasted nuts after the cream is folded in. If using fruit, toss it in a tablespoon of flour or cornstarch first to prevent excess moisture from creating ice crystals.
No-Churn Ice Cream Cake
Ingredients
Equipment
Method
- Make the crust: In a medium bowl, stir together the chocolate wafer crumbs and melted butter until evenly moistened. Press firmly into the bottom of a 9-inch springform pan. Freeze for 15 minutes while you prepare the filling.
- Make the fudge ripple (optional): In a small saucepan, combine the heavy cream, sugar, cocoa powder, butter, and salt. Whisk over medium heat until smooth and bubbling, about 3 minutes. Remove from heat and let cool to room temperature, stirring occasionally.
- In a large bowl, combine the sweetened condensed milk, vanilla, and salt. Whisk to blend.
- In the bowl of a stand mixer fitted with the whisk attachment (or with a hand mixer), whip the cold heavy cream on medium-high speed until stiff peaks form—the cream should stand up firmly when you lift the whisk, but not look grainy or curdled. This takes about 3–4 minutes.
- Gently fold one-third of the whipped cream into the condensed milk mixture to lighten it. Then fold in the remaining whipped cream until just combined—no white streaks remain, but do not overfold or the base will deflate.
- If using, fold in the mini chocolate chips.
- Spread half of the cream mixture over the chilled crust. Drop spoonfuls of half the cooled fudge ripple over the surface, then swirl with a knife. Repeat with the remaining cream mixture and fudge ripple, creating a marbled top.
- Cover the pan tightly with plastic wrap and freeze for at least 6 hours, or overnight, until completely firm—the center should feel solid when pressed gently.
- To serve, run a thin knife around the edge of the pan, release the springform side, and let the cake sit at room temperature for 5–10 minutes before slicing with a warm, dry knife. Wipe the blade clean between cuts for neat slices.